Configuring Quest Toad Edge
Suggest editsImplementing Quest Toad Edge with EDB Postgres Advanced Server or EDB Postgres Extended Server requires the following components:
- A running EDB Postgres Advanced Server or EDB Postgres Extended Server instance.
- Quest Toad Edge application installed on a system where you will manage the running database. (EDB JDBC Driver included)
The following steps show how to configure Quest Toad Edge for EDB Postgres Advanced Server and EDB Postgres Extended Server:
EDB Postgres Advanced Server Configuration
- Launch the Toad Edge application.
- On the main menu, go to the
Connectdropdown and selectNew Connection. - In the
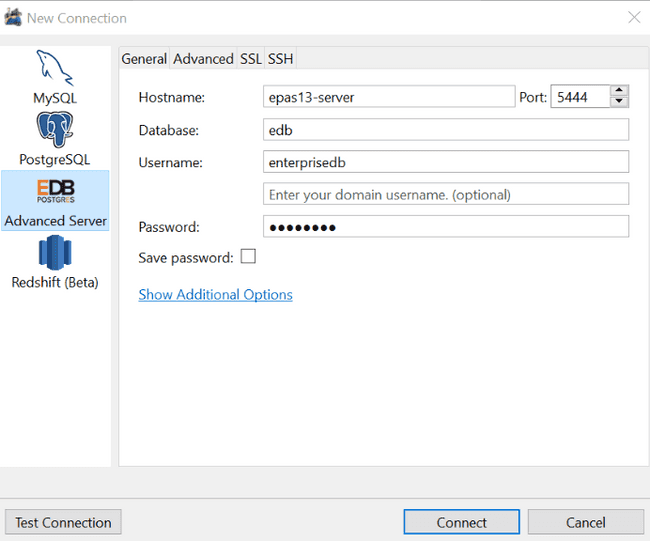
New Connectionscreen, enter the following values:Hostname,Port,Database,Username,Password. - Select
EDB Postgres Advanced Serveron the left pane. - Click
Test Connectionto verify connectivity to the database server. - If the connection is successful, click
Connect. Otherwise verify your database information and try again.

Update the Driver, If Required
If it is required, you can update the EDB JDBC driver by downloading the latest version from EDB and then replacing the default EDB JDBC jar.
- Download the new Driver from EDB.
- Go to the drivers directory for your Toad Edge installation. For example:
C:\Program Files\Quest Software\Toad Edge\lib\drivers. - Rename or backup the existing EDB JDBC Driver so that you have a copy to restore if needed.
- Copy the new EDB JDBC Driver to the
driversfolder. - Launch Toad Edge and create a new connection for EDB Postgres Advanced Server as shown above in the EDB Postgres Advanced Server Configuration section.
EDB Postgres Extended Server Configuration
- Launch the Toad Edge application.
- On the main menu, go to the
Connectdropdown and selectNew Connection. - In the
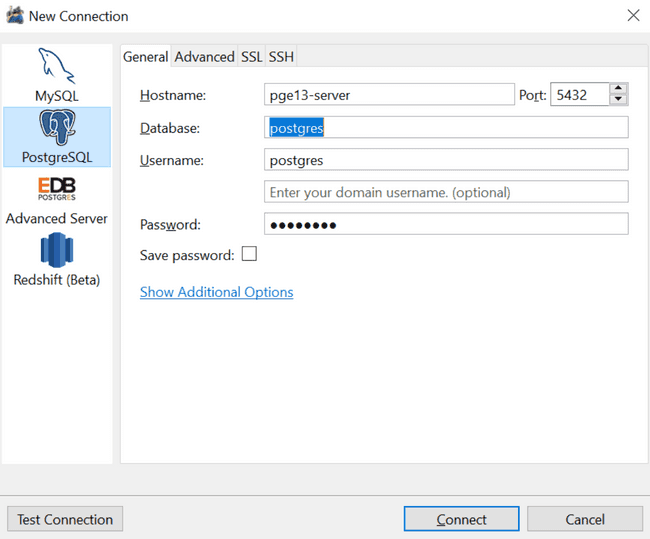
New Connectionscreen, enter the following values:Hostname,Port,Database,Username,Password. - Select
PostgreSQLon the left pane. - Click
Test Connectionto verify connectivity to the database server. - If the connection is successful, click
Connect. Otherwise verify your database information and try again.

Could this page be better? Report a problem or suggest an addition!